Write a Slack bot using Laravel and PHP
This guide will show you how to configure Slack and get started with writing your first Laravel-based Slack bot using my PHP Slack Bot API.
Set up Slack #
Start by creating a new Slack app for your team.
Visit https://api.slack.com/apps?new_app=1 and give your app a fancy name, as well as selecting the Slack Team you want to have this bot connected to.
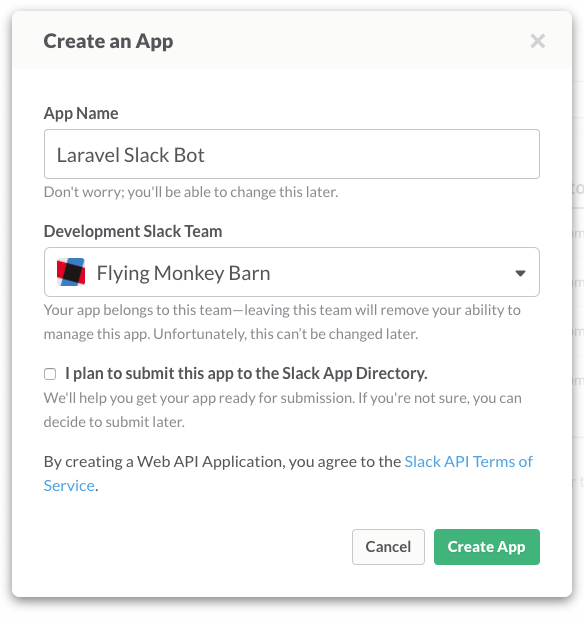
Click "Create App" and take note of your App's Client ID and Client Secret - you'll need this in your Laravel app.
Click on "OAuth & Permissions" and enter the redirect URL: http://YOUR-LARAVEL-APP-HERE/connect/slack/.
That's it for now - we need to revisit the Slack settings later - but first let's move ahead with our Laravel app.
Set up your Laravel app #
I assume that you've already set up a new Laravel application.
Start by adding the Client ID, Client Secret and the redirect URL to your .env file:
SLACK_KEY=
SLACK_SECRET=
SLACK_REDIRECT_URI=
SLACK_TOKEN=
Notice that we've already added a variable SLACK_TOKEN which will hold our Bot token later.
We will use Slack's new Event API to communicate with the Slack Bot and our Laravel application. The Event API works by sending a given URL POST requests with various event information, which we can then respond to.
In order to validate the URL, Slack needs some special treatment.
Add the following snippet to your new Laravel application. This will add a /slack POST route to your app, which will handle Slack's URL verification.
Route::post('/slack', function(\Illuminate\Http\Request $request){

    $payload = $request->json();

    if ($payload->get('type') === 'url_verification') {
        return $payload->get('challenge');
    }

    // Bot logic will be placed here
}
Okay - so this assures that Slack can successfully send events to our application, which we can then use with our Bot.
There's one more thing we need to do, which is setting up a simple OAuth flow in order to retrieve a Bot access token. We will simply use Laravel Socialite for this.
Setting up Laravel Socialite OAuth flow #
You can install the needed dependencies using:
composer require laravel/socialite
composer require mpociot/socialite-slack
Next, add this to your providers array in your config/app.php file:
\SocialiteProviders\Manager\ServiceProvider::class,
And also set up the Socialite facade in the aliases section:
'Socialite' => \Laravel\Socialite\Facades\Socialite::class,
Add SocialiteProviders\Manager\SocialiteWasCalled event to your listen[] array in <app_name>/Providers/EventServiceProvider.
Like this:
/**
 * The event handler mappings for the application.
 *
 * @var array
 */
protected $listen = [
    \SocialiteProviders\Manager\SocialiteWasCalled::class => [
        // add your listeners (aka providers) here
        'Mpociot\Socialite\Slack\SlackExtendSocialite@handle',
    ],
];
Phew - we're nearly there. The only thing missing is the login / redirect code in our app.
So add it:
Route::get('/login/slack', function(){
    return Socialite::with('slack')
        ->scopes(['bot'])
        ->redirect();
});
Route::get('/connect/slack', function(\GuzzleHttp\Client $httpClient){
    $response = $httpClient->post('https://slack.com/api/oauth.access', [
        'headers' => ['Accept' => 'application/json'],
        'form_params' => [
            'client_id' => env('SLACK_KEY'),
            'client_secret' => env('SLACK_SECRET'),
            'code' => $_GET['code'],
            'redirect_uri' => env('SLACK_REDIRECT_URI'),
        ]
    ]);
	$bot_token = json_decode($response->getBody())->bot->bot_access_token;
    echo "Your Bot Token is: ". $bot_token. " place it inside your .env as SLACK_TOKEN";
});
Now visit /login/slack on your Laravel app in your browser and you will be redirected to Slack.
After authorizing the Bot, you will be redirected back to your app and will be presented with a Bot access token.
Place it inside your .env file as SLACK_TOKEN.
Configuring Slack with your application URLs #
Okay - we're nearly done with the setup!
Head back to your Slack app configuration's "Event Subscriptions" settings.
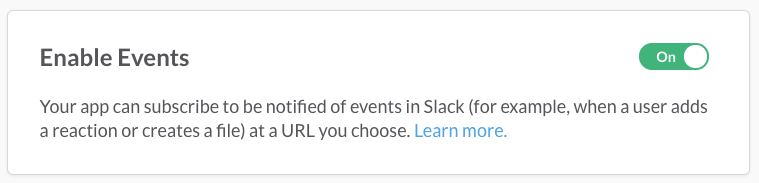
Enable the events and enter the just configured /slack POST request URL.
Slack will then send the URL verification.
Depending on how you want to interact with your bot, you should enable the following bot events:
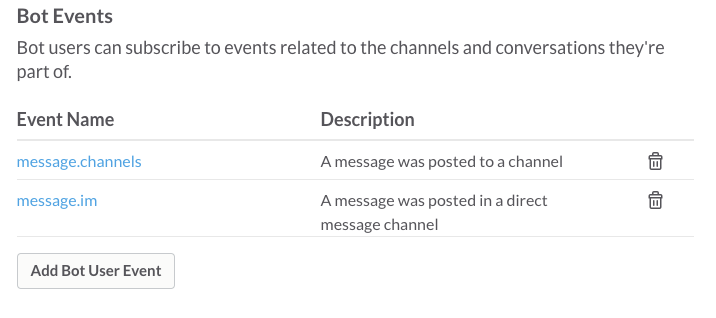
Those are the events your Laravel application (and Bot) will receive.
Writing your bot logic #
First of all, install the slackbot package.
composer require mpociot/slackbot
Add the ServiceProvider to your config/app.php.
\Mpociot\SlackBot\SlackBotServiceProvider::class,
Now that you have told Slack how they can contact your Laravel application and talk to your bot, it's time to write the bot logic.
Update your /slack POST route so it looks like this:
Route::post('/slack', function(\Illuminate\Http\Request $request){

    $payload = $request->json();

    if ($payload->get('type') === 'url_verification') {
        return $payload->get('challenge');
    }

    $slackBot = app(SlackBot::class);
    $slackBot->initialize(env('SLACK_TOKEN'));

    $slackBot->hears('hello', function (SlackBot $bot) {
        $bot->respond('hi');
    });
}
Further modifications #
While the Slack Bot itself is still under development, this tutorial shows you how to set up Slack and your Laravel app to get started with writing your own Slack Bot.
I will update this blog and add more topics like the Conversation API.